Gelichrizum
Contingut:
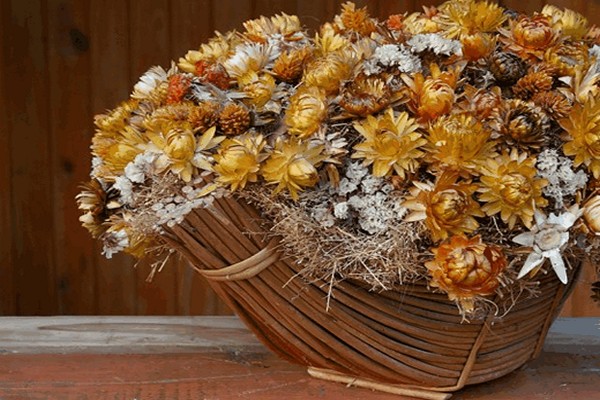
Gelikhrizum és una bella planta que té un color interessant i brillant, també és interessant que aquesta flor té un llarg període de floració. Això significa que la seva bellesa farà les delícies del jardiner durant molt de temps. Al mateix temps, la frescor i el color de la planta no s’esvaeixen, però segueixen sent els mateixos que al començament de la floració. Molts jardiners assecen els pètals de les flors després de la floració, i encara conserven el seu color. Molt sovint Gelikhrizum és utilitzat per les floristeries, ja que junt amb ella s’obtenen composicions belles, fresques i seques. Gelichrizum es refereix a les plantes que no requereixen molta atenció i només necessiten cures bàsiques. També a causa del fet que és fàcil de cultivar, el cost de les flors continua sent baix.
De moment, hi ha unes 600 subespècies de Gelichrizum i totes es diferencien entre si segons criteris diferents. Quan conreu una planta, heu de triar un mètode de plantació, ja que hi ha 2 mètodes. El primer mètode consisteix en l’ús de llavors i el segon mètode fa servir plantules. El més important per cuidar una flor amb Gelichrizum és el reg, ja que la planta tolera molt malament una gran quantitat d’aigua o l’estancament. Això es deu al fet que durant l’estancament de l’aigua comença a formar-se un fong al sistema radicular, que afecta totes les arrels i la planta pot morir.
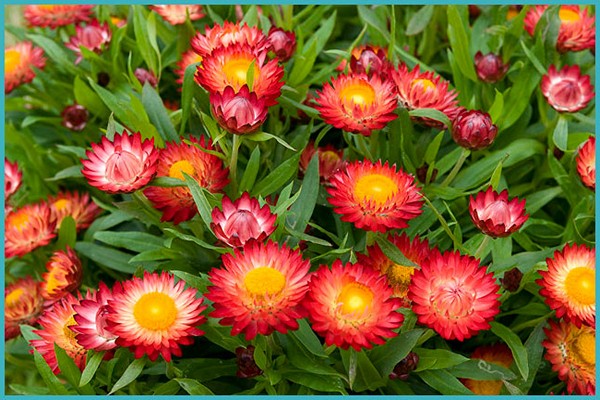
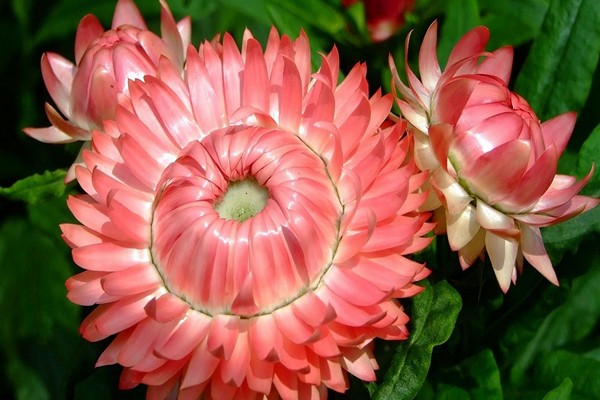
Planta Gelikhrizum: foto de la flor
Gelikhrizum: descripció de la planta
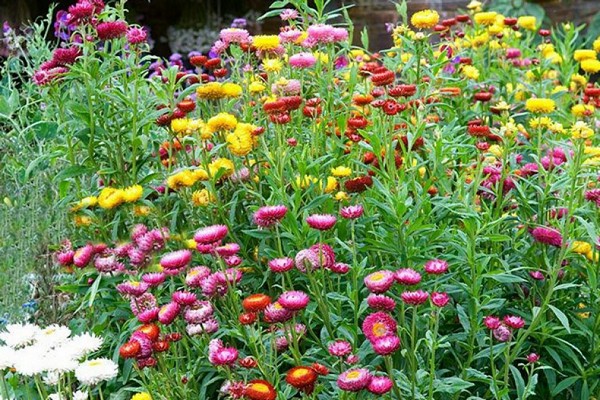
La planta Gelikhrizum es considera perenne, però entre les moltes espècies també es poden trobar flors anuals. Però hi ha força espècies d’aquest tipus i el percentatge principal és perenne. El període de floració de Gelikhrizum comença a principis de juny i acaba a finals d’agost o principis de setembre.
Nota: Si la tardor és càlida a la vostra regió, Gelikhrizum florirà fins a principis d’octubre.
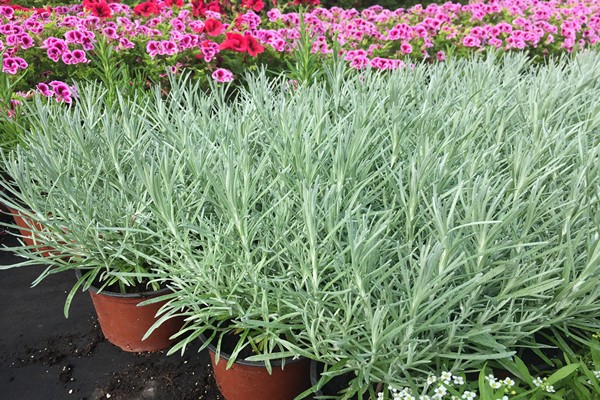
Del llatí Gelikhrizum significa lluentor daurada, aquest nom es va donar pel seu color. A més, la planta té altres noms, molt sovint es diu immortelle, tsmin, immortelle, flor groga o flor daurada.
Nota: Atès que aquesta planta va créixer durant un temps a Madagascar i es va desenvolupar allà, es pot escoltar el nom d’or de Madagascar. Aquest nom es va donar a la flor no només pel seu creixement a Madagascar, sinó també perquè té un color groc ataronjat.
Bàsicament, la planta es desenvolupa en regions càlides.
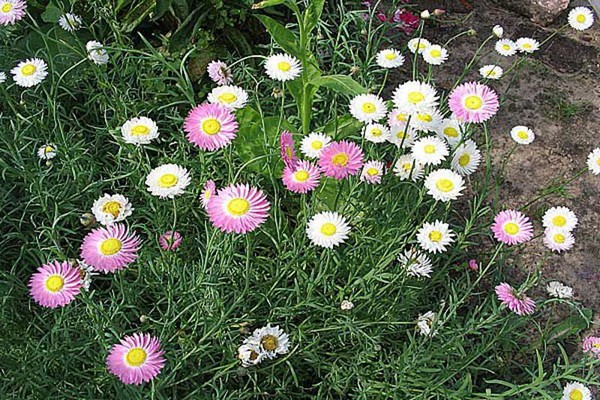
Planta Gelikhrizum: foto de la flor
Com propagar una planta?
Normalment, s’utilitzen dos mètodes per a la reproducció de Gelikhrizum, per llavors i per divisió. Per a la reproducció, cal esperar fins que la planta s’hagi esvaït completament. Després, heu de començar a recollir les caixes que hi ha a les plantes. Aquestes càpsules contenen llavors. Posteriorment, aquestes llavors es planten i creixen nous individus d’aquesta cultura.
El segon mètode es caracteritza per dividir la planta en 3-5 parts. És a dir, la planta Gelikhrizum és presa i separada per una podadora de jardí afilada, després de la qual es planta immediatament a terra. Al sòl, una part de la planta es desenvolupa i forma el seu propi sistema radicular. El resultat són diverses flors de ple dret que es van cultivar a partir del mateix cultiu.
Nota: Molts jardiners decoren la seva parcel·la amb flors anuals. Aquesta plantació és molt més fàcil que cultivar un cultiu perenne.
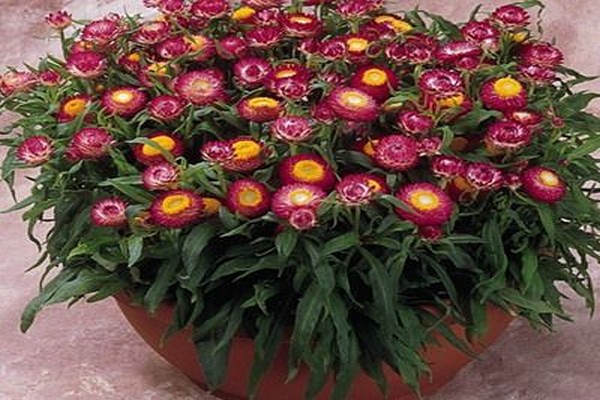
Planta Gelikhrizum: foto de la flor
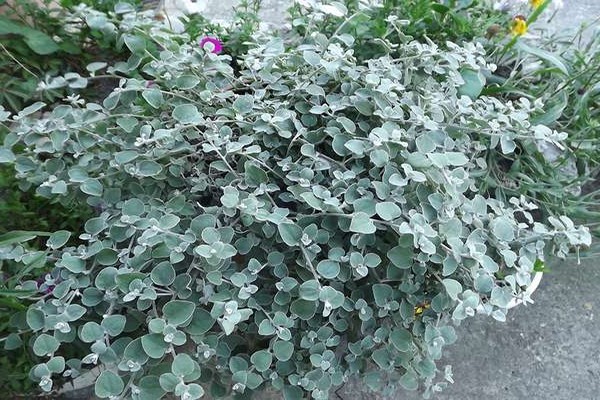
Preparació de plàntules Gelikhrizum
Les llavors de Gelikhrizum es comencen a sembrar a principis de març.La plantació de llavors de Gelikhrizum es realitza en petits contenidors amb 4-5 llavors a cada forat. Després de sembrar, heu de regar una mica les llavors i cobrir-les amb vidre o film. D'aquesta manera, es forma una mena d'hivernacle i, en aquestes condicions, el brot apareixerà més ràpid. Després que comencin a aparèixer petits brots, heu de treure el got i filmar. En pocs dies, les plàntules de Gelikhrizum es faran més fortes i llestes per ser trasplantades a un lloc permanent. Cal tenir en compte que la temperatura al camp obert ha de ser prou alta, aproximadament +18 graus. Si la temperatura és inferior a +16, el trasplantament s’ajorna per un temps.
Plàntula Gelikhrizum: foto
Gelikhrizum: plantar una planta en terreny obert
Només les plantules madures de Gelikhrizum es trasplanten a terra oberta. Si el trasplantament es realitza massa aviat, el brot al nou lloc simplement morirà.
Quan trasplantar plantules de Gelikhrizum?
El trasplantament de Gelikhrizum s’ha de dur a terme a la primavera, quan el clima es fa més càlid, aproximadament +18 graus. A més, no s’ha d’observar gelades a la nit. Aquest període sol caure a mitjan abril o principis de maig, depenent de la regió on es faci el trasplantament.
On plantar?
Abans del trasplantament, heu de pensar sobre la zona on creixerà Gelikhrizum. La millor opció seria plantar-se a la part sud del territori, ja que hi haurà prou llum solar per a la flor. La planta li agrada molt la llum i la calidesa, de manera que han d’estar presents durant tota la temporada. Si es planta a l’ombra, la planta serà lenta i el període de floració s’escurçarà. Un fet molt comú en plantar a l’ombra és la completa absència de floració.
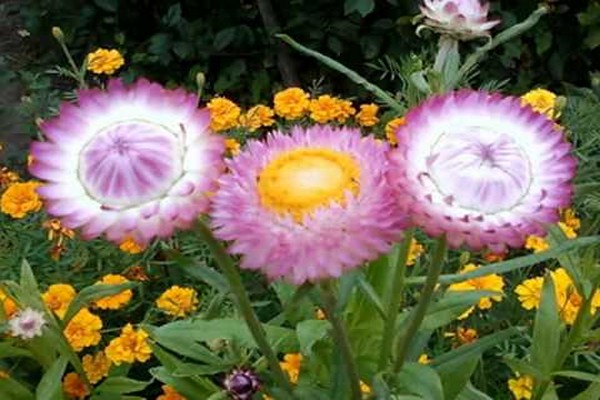
Planta Gelikhrizum: foto de la flor
Sòl per Gelichrizum
Es pot localitzar absolutament qualsevol sòl al lloc d’aterratge de Gelikhrizum, ja que és segons aquest criteri que Helichrizum és indiferent. Creix bé, tant en sòls negres com en terres argilosos. L’únic és que el sòl no s’ha de situar per retenir la humitat durant un llarg període. El sòl ha de ser fèrtil, però per a aquesta alimentació nutritiva s'aplica al començament de la sembra. Normalment inclou torba i sorra.
Nota: Quan es trasplanten, val la pena tenir en compte la ubicació de les aigües subterrànies, ja que un excés o estancament de la humitat pot provocar la mort de la flor.
Algorisme d'aterratge Gelikhrizum
En plantar Gelikhrizum, cal seguir algunes regles. En primer lloc, amb plantacions a gran escala, cal observar la distància entre individus, d’uns 40 centímetres. La distància pot ser una mica més gran, ja que tot depèn de la varietat que el jardiner planti a la seva zona. Mantenir una distància és una regla molt important a l’hora de plantar, ja que permet que la planta funcioni correctament i no interfereixi en el desenvolupament dels altres.
La següent regla és que abans de plantar-lo, haureu d’aplicar una capa superior al sòl per donar al brot els primers nutrients que gastarà en el creixement. Normalment s’utilitzen substàncies orgàniques, uns 2500-3000 grams d’humus o compost, s’afegeixen a la matèria orgànica uns 10 grams de suplements minerals. Aquesta introducció s’ha de fer 7-10 dies abans de realitzar el trasplantament.
Nota: Gelichrizum té un costat positiu agradable, que és que pot créixer amb absolutament qualsevol planta: camamilla, lobelia, sàlvia, romaní, espígol, farigola i altres. Al mateix temps, no els treu nutrients i no interfereix en el seu desenvolupament.
Planta Gelikhrizum: foto de la flor
Gelichrizum: cura de les plantes
Gelichrizum requereix una atenció mínima, per tant, una cura bàsica. Consisteix en regar, fertilitzar, podar i preparar-se per al període hivernal.
Reg
La sequera o la manca d’aigua Gelikhrizum tolera bé, de manera que si regueu rarament la planta, tindrà un bon efecte sobre la planta. Al cap i a la fi, el més perillós per a la cultura és l’excés d’humitat.S’ha d’evitar i el sòl de la planta sempre ha de ser lleugerament sec, sense excés d’humitat.
Fertilització
És molt important que Gelikhrizum apliqui una capa superior al sòl, ja que gràcies a ells s’omple de força i el gasta en crear bells brots, que delectaran encara més el jardiner. Sovint, els jardiners utilitzen fertilitzants minerals, que consisteixen en nitrogen i fòsfor. De mitjana, cal aplicar aproximadament tres apòsits addicionals per temporada, aquesta quantitat és suficient perquè la planta funcioni bé.
La primera alimentació es realitza ja 2 setmanes després de la sembra. En la primera aplicació, cal utilitzar un apòsit complex, ja que provocarà un creixement actiu a la planta, així com el seu enfortiment al sòl. A la resta de l’apòsit s’utilitza fertilitzant que el jardiner trobarà necessari per al cultiu.
Planta Gelikhrizum: foto de la flor
Retallar
La poda de Gelikhrizum es realitza un cop per temporada, a l’estiu. Durant la poda, s’han d’eliminar tots els brots i branques 2/3 de tota la longitud. Molt sovint es practica un tall complet de branques, ja que durant l’hivern s’assequen i es trenquen. Per tant, la poda de les branques ajudarà a evitar el trencament de les branques.
Preparació per al període hivernal
Preparar la planta Gelikhrizum per a l’hivern és bastant senzill. Cal aïllar el sistema arrel mitjançant torba i serradures. En primer lloc, heu de col·locar la torba al voltant del tronc de la planta i, a continuació, col·loqueu el serradur a sobre de la torba. Aquest refugi permetrà sobreviure perfectament a l’hivern.
També podeu trasplantar l’arbust a una caixa i posar-lo a casa i, amb l’inici de la primavera, tornar a plantar la planta a terra oberta.
Planta Gelikhrizum: foto de la flor
Malalties de les plantes
Gelichrizum té una elevada immunitat a les malalties i les plagues, però algunes plagues poden establir-se a Gelichrizum. La planta pot emmalaltir amb pugons o eruga de bardana. És molt senzill desfer-se’n, n’hi ha prou amb dur a terme el tractament amb un medicament sistèmic, que té com a objectiu combatre aquesta plaga. M’agradaria tenir en compte que en plantar un cultiu amb altres plantes propenses a patir malalties, Gelikhrizum cura una planta veïna i comença a fer mal amb menys freqüència de l’habitual.
Planta Gelikhrizum: foto de la flor